Book Repair: Hinge Tightening II
By Carole Dyal and Pete Merrill-Oldham
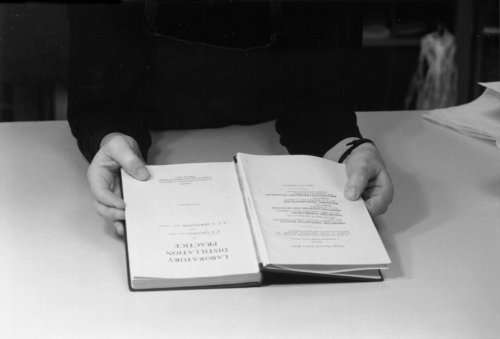
Open the cover. If the endpaper (or the endpapers and the title page) are pulling away from the inside of the case and the spine lining is visible and intact, Hinge Tightening II may be an appropriate treatment. If neglected, a text block in this condition is likely to require major repair or rebinding in the very near future.
Materials required
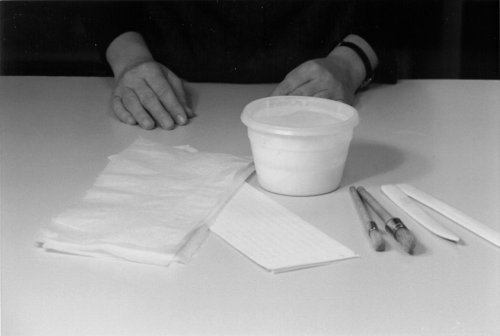
Assemble the following: polyvinyl acetate adhesive (PVA) in a low container, a glue brush, waxed paper, wide strips of scrap paper, and a bone folder. A book press and metal edged boards (or appropriate substitutes) will also be needed.
Step 1: Applying adhesive to spine lining and hinge
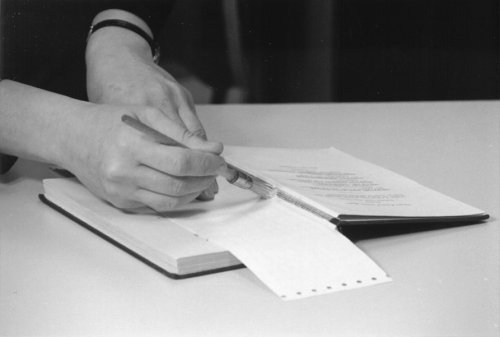
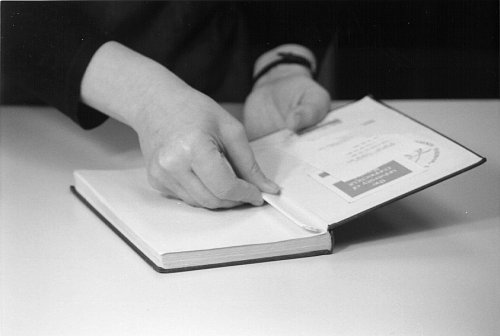
Open the book to the place where the text block and endpaper have separated. Lay a piece of scrap paper along the text block about 1/8 inch from the exposed hinge area. Carefully brush PVA on the exposed spine lining and on the underside of the fold of the endpaper.
Step 2: Aligning the endpaper and the text block
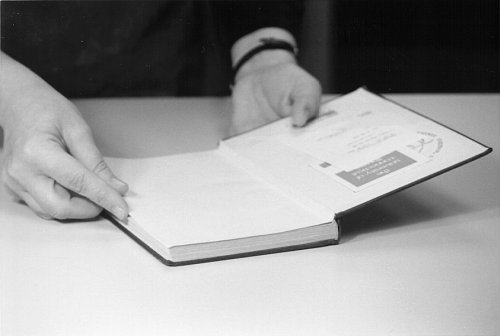
With the book still open, carefully align the endpaper and the text block to ensure that the fold of the endsheet exactly meets the shoulder of the text block. This will help to assure proper opening of the book after drying.
Step 3: Setting the endpaper alignment
Using the long edge of the bone folder, gently press the fold of the endpaper into the hinge.
Step 4: Preparing for pressing
Insert a sheet of wax paper as far back as possible into the hinge. This will prevent excess adhesive from sticking to the endpaper and also help to assure proper opening of the book after drying.
Step 5: Setting the hinge
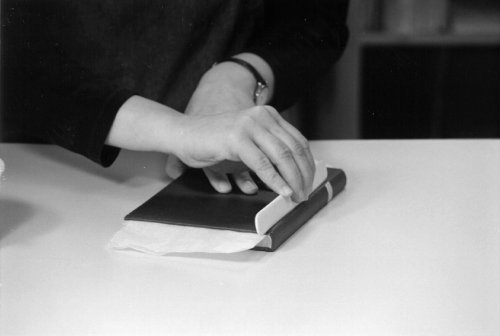
Check to make sure that the text block is still square in its case. Then run the long edge of a bone folder down the length of the outer hinge of the case, applying even pressure.
Step 6: Pressing the volume
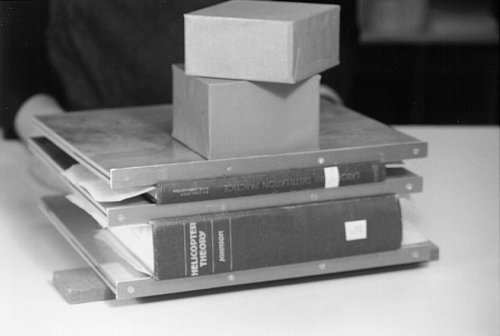
Press the book for several hours or over night, making sure that even pressure is applied in the joints. Use one of the pressing methods discussed previously.