Look Behind the Frame
You choose a frame that fits your aesthetic and complements your décor. But what goes under the molding is just as important, or more! Let’s take a look behind the frame and review all the parts. Every choice you make in the framing process can impact the level of protection against dust, moisture, pollutants, and climate changes. All components should be acid-free and buffered to help prevent future acid formation. Both the artwork and the backing should be secured using pH-neutral adhesives and tapes.
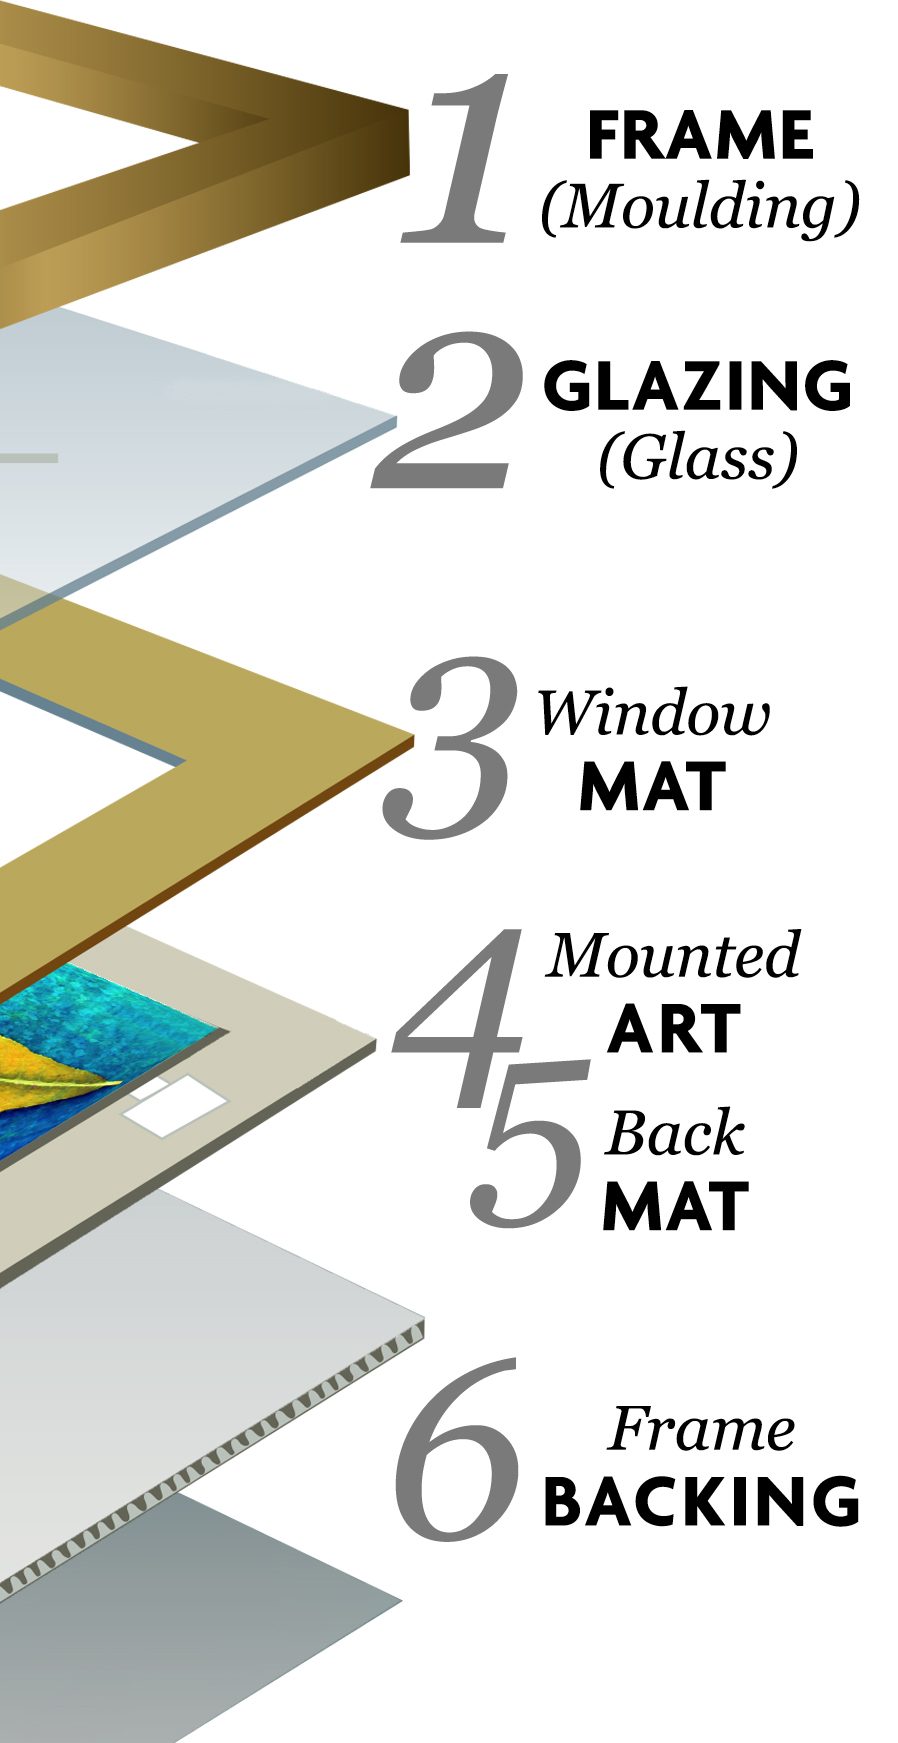
1. Frame
If you’re building the frame yourself, our Lineco Frame PVA Adhesive is specially formulated for bonding wood or medium-density fiberboard (MDF) moulding. This high-density adhesive dries quickly and clear. For added protection, apply Lineco Self-Adhesive Frame Sealing Tape to minimize off-gassing from wooden frames and create a more stable environment for your artwork.
2. Glazing
Both glass and Plexiglas are available with UV-filtering layers to protect your print or photograph from harmful light. Some museum-quality glass is also non-reflective, enhancing the viewing experience. Whatever glazing material you choose, to ensure it does not come into contact with the artwork. As an option, add an extra layer of protection with Foam Rabbet Tape to the frame's inner edge for cushioning and sealing.
3. Window Mat
The window mat is the next layer, offering both structural support and necessary air space between the glazing and the artwork. Our Lineco Museum Mounting Mat Board is made from 100% cotton rag, acid-free, buffered, and free of alum and lignin. For a more economical option, our Conservation Mounting Mat Board features pigmented conservation-quality surface papers and a high alpha-cellulose conservation core. Both are available in four popular colors.
4. Attaching Art to the Back Mat
Museum conservators prefer using Japanese tissue with wheat or rice starch paste—an archival, easily reversible traditional method. The hinge is adhered to the back of the artwork with a portion extending above; when the piece is placed face-up on the back mat, a second piece of tissue secures it without touching the artwork. The window mat will completely hide the hinges. For easier application, our Hinging Tapes (available in water-activated or self-adhesive styles) are a great option, and Mounting Strips and Corners offer reliable, self-adhesive alternatives that avoid direct contact with the art.
5. Back Mat
Once again, Archival Quality Mounting Board will provide the safest support for your artwork. Since the entire back of the art, print, or photograph you’re mounting will lie completely against this layer, it may very well be the most crucial layer of the frame package. Back Mat can be attached to the Window Mat using our most popular Self-Adhesive Linen Hinging Tape.
6. Frame Backing
Sufficient backing provides additional strength and rigidity, and immobilizes the mounted artwork within the frame. Any paper backing board should be acid free and preferably buffered. We’ve created an excellent alternative to plastic or foam - White Corrugated Backing Board, which is extremely rigid and 100% recyclable. For volume and production framing and mounting where function and efficiency matter most, we have an affordable solution - Acid-Free Tan Corrugated Board. Last layer - Frame Backing Paper, seals the entire framing package to the back of the frame, usually using ATG or Handheld double-sided tape. This step prevents dust, dirt, and other pollutants, as well as insects, from being able to infiltrate the frame.